Putting the kiosk online with its hotspot #
NB. 1 – Make sure you have downloaded the“WB Charge” application onto your phone. Then log in to your account, or create one if you don’t have one (see“Creating a user account“).
NB. 2 – The hotspot does not work with the 4G module (please follow the online procedure via computer).
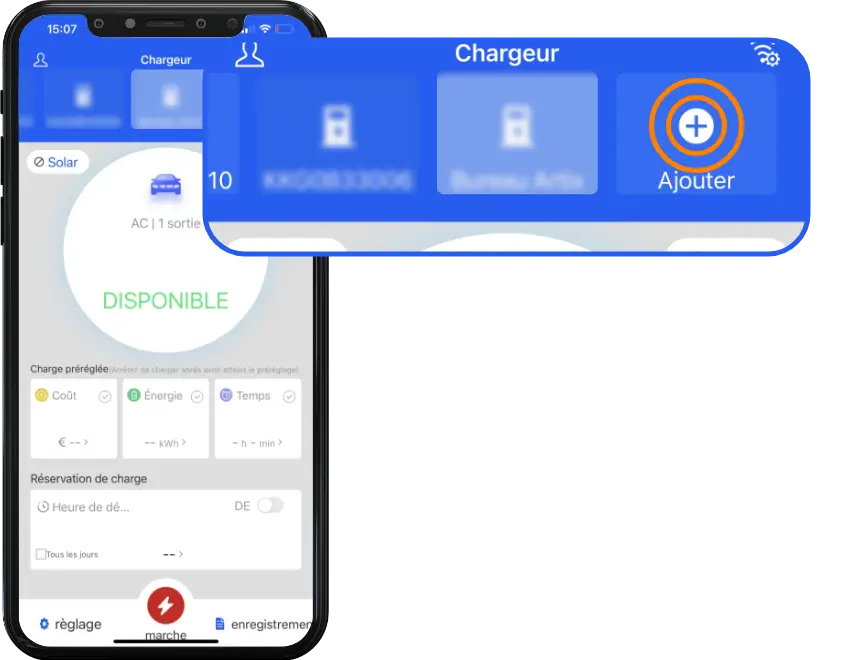
- You now have access to your account home page, where you can add and associate your terminal. Select “Add a device“.
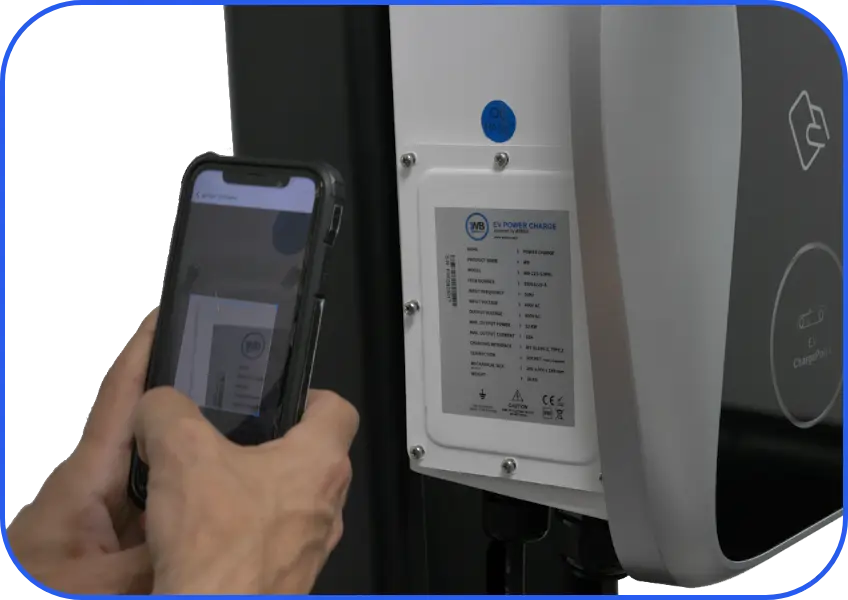
- Enter or scan your bollard’s serial number, found on the product label located on one side of your bollard (e.g. S/N:BNE0AXXXXX). The side on which the label is located may change depending on your bollard model and version (e.g. VA, VB).
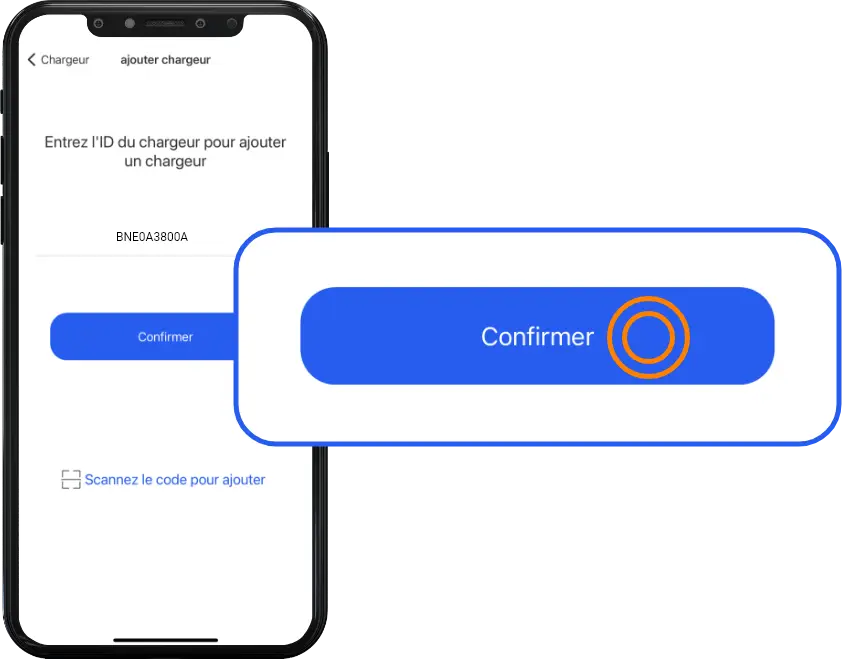
- Once the serial number has been entered, please “Confirm” to finalize the synchronization of your account with the terminal.
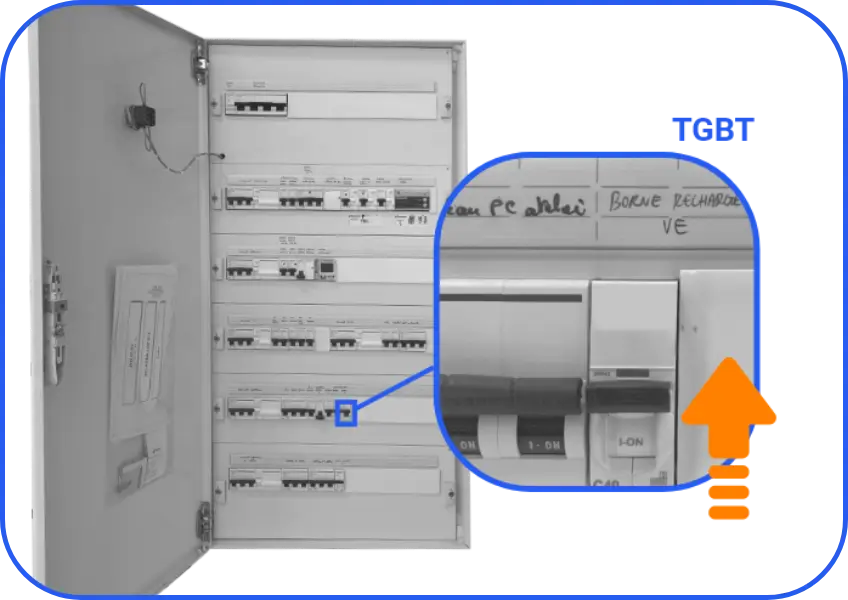
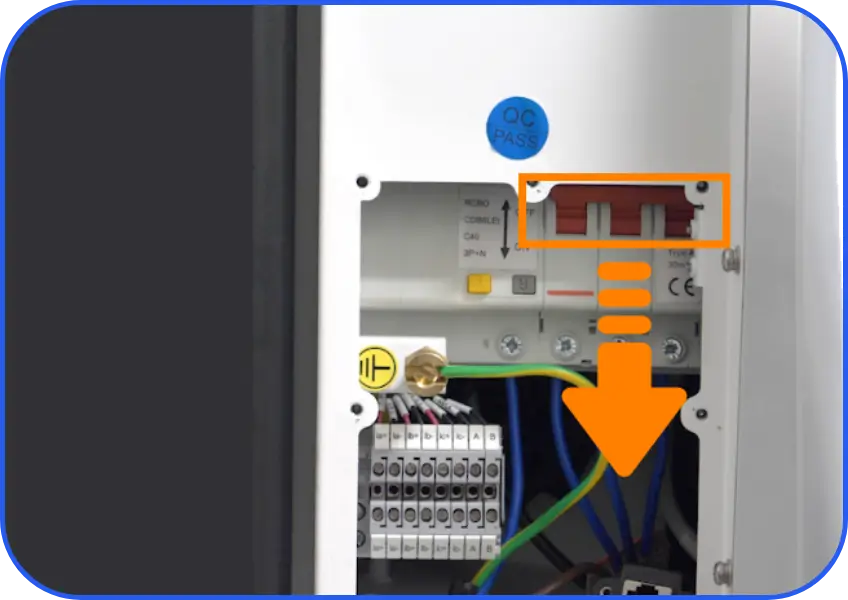
- Switch on the terminal. Switch on the protective switch(es) and circuit breaker(s) on your TGBT (General Low Voltage Board) upstream of the terminal, in the ON position.
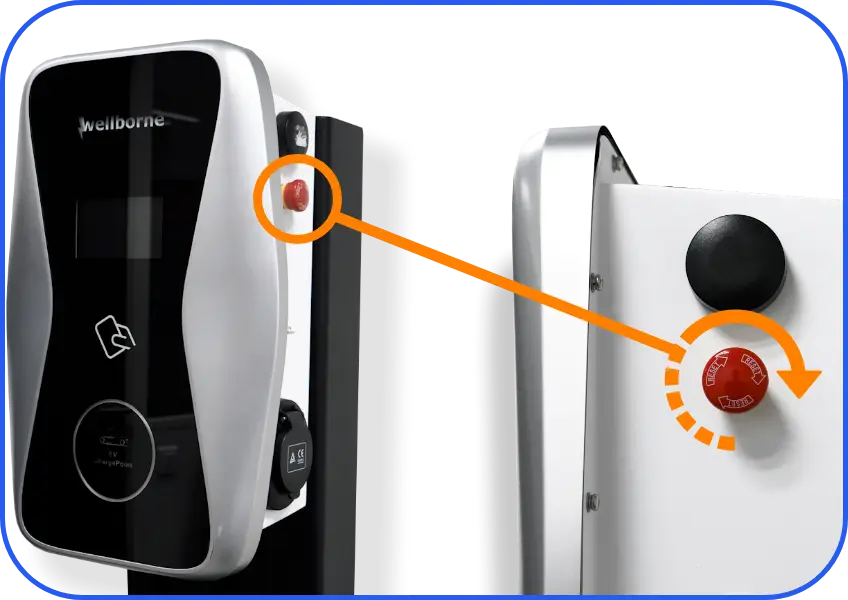
- Check that the red emergency button on the left-hand side of the terminal is not pressed (turn the red button clockwise to release it).
- Turn down the red switch on the terminal’s built-in differential to the ON position.
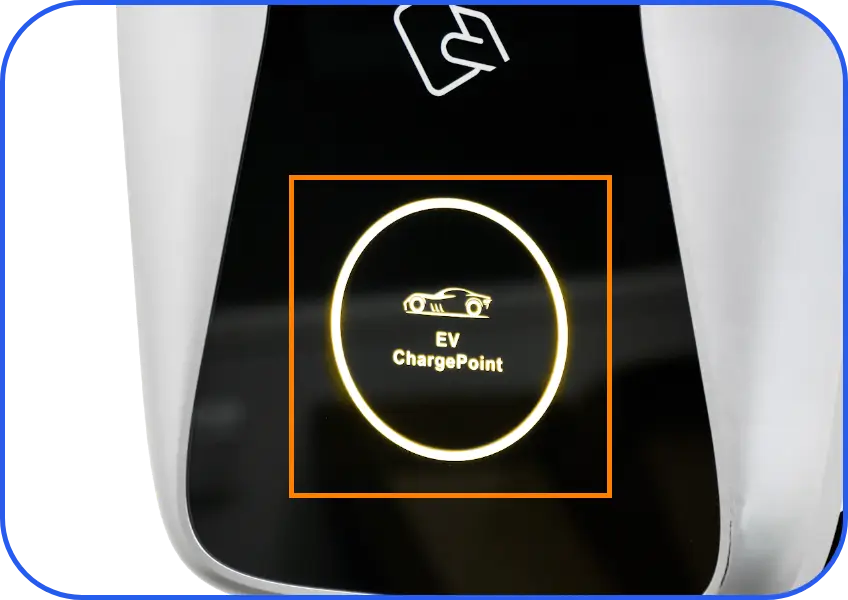
- Once the bollard has been powered up, the Wellborne logo will become backlit, and the front LED strip will flash yellow to indicate that the bollard has started up correctly. From the moment the bollard is powered up, a WIFI signal is emitted locally by the bollard for a limited period of 3 to 5 minutes, in order to“pair” the bollard with the local WIFI connection available.
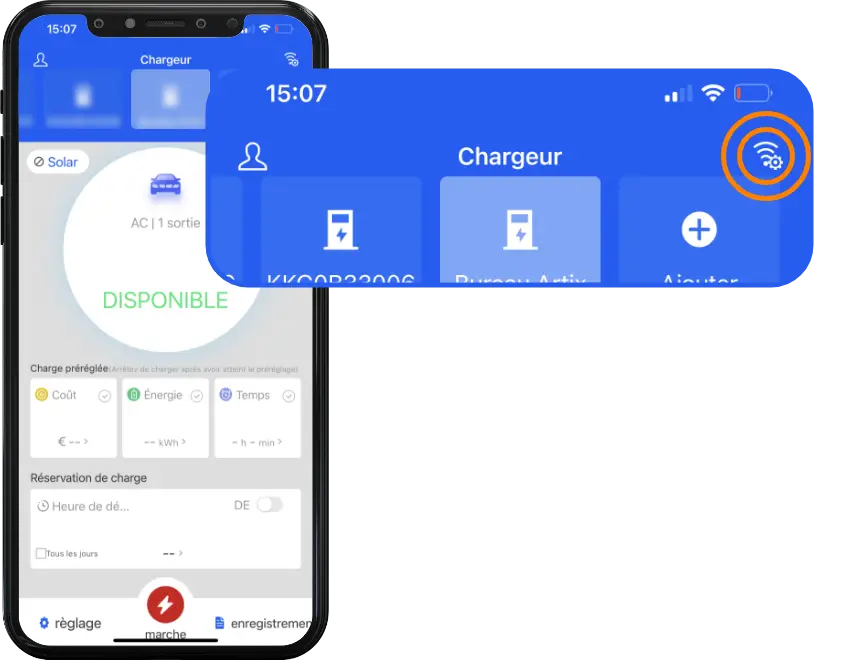
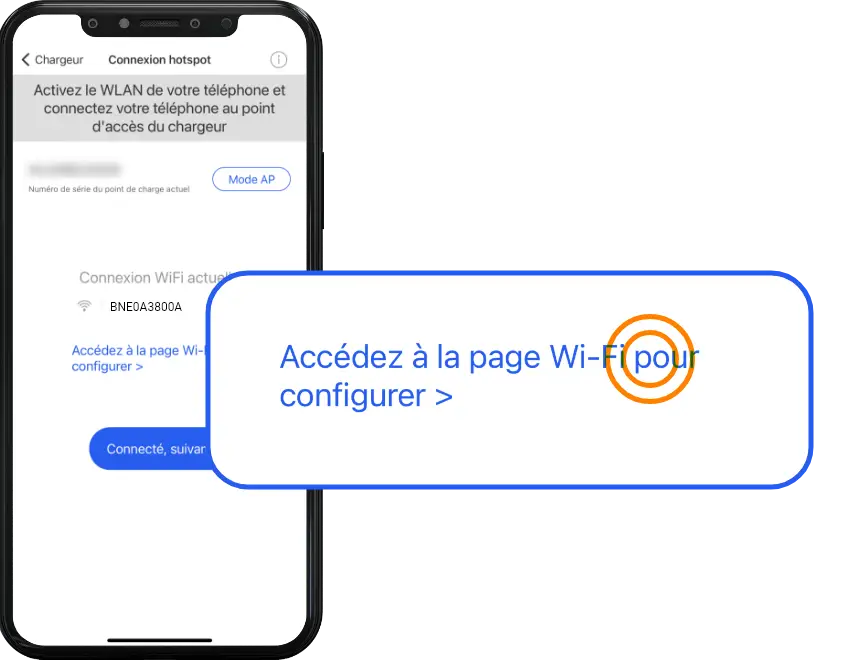
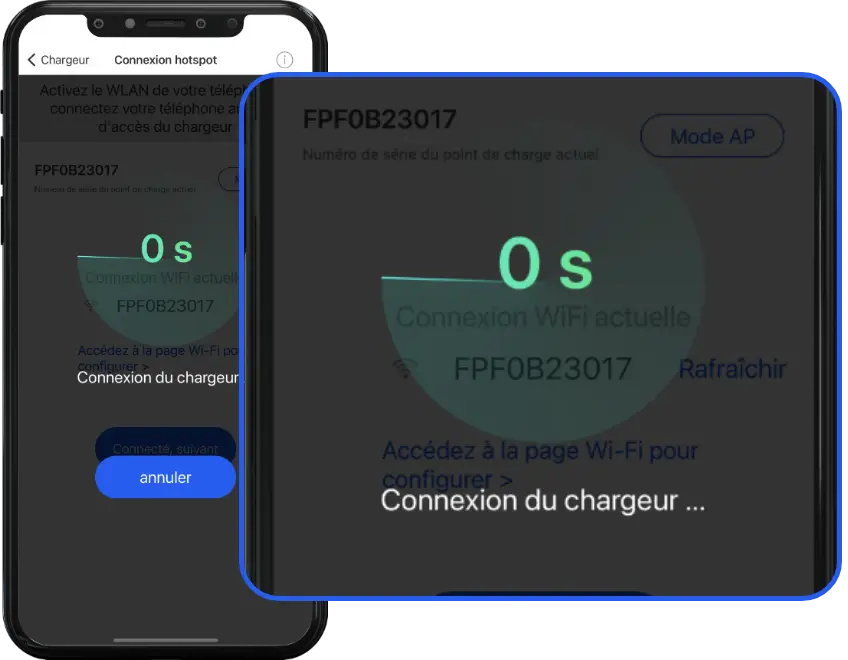
- Go back to the WB Charge application and click on the Wi-Fi icon in the top right-hand corner. Check that you are indeed connected to your terminal’s WIFI (connection name = terminal serial number).
- Press “Go to Wi-Fi configuration page“.
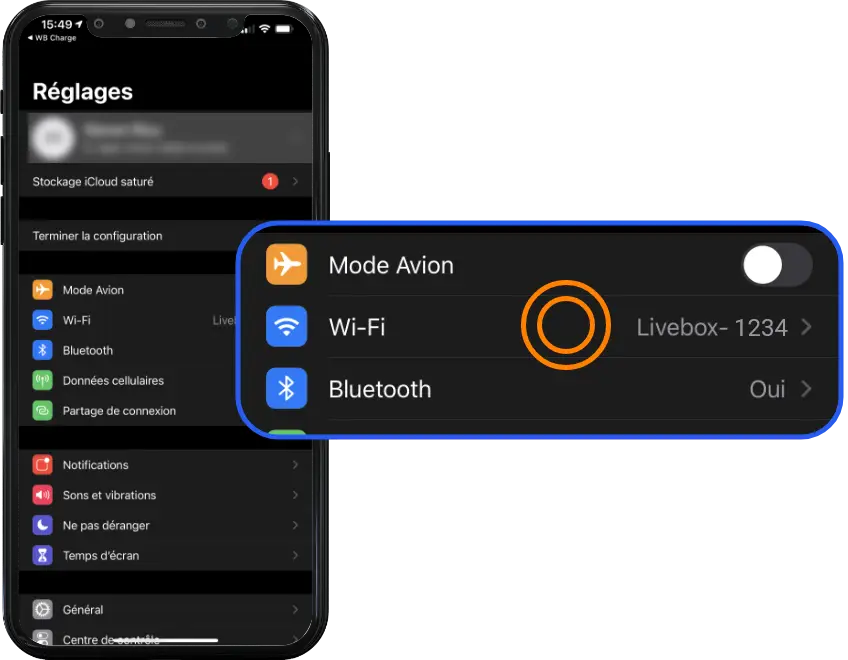
- Once redirected to your smartphone’s settings page, press “Wi-Fi“.
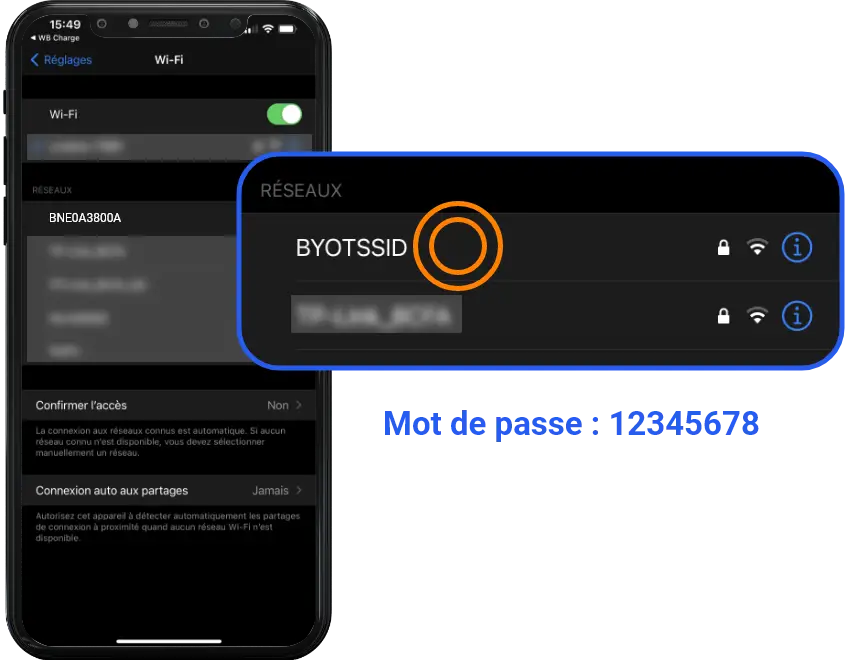
- Connect to the Wi-Fi connection with your terminal’s serial number (e.g. BNE0A3800A). The default password is: 12345678
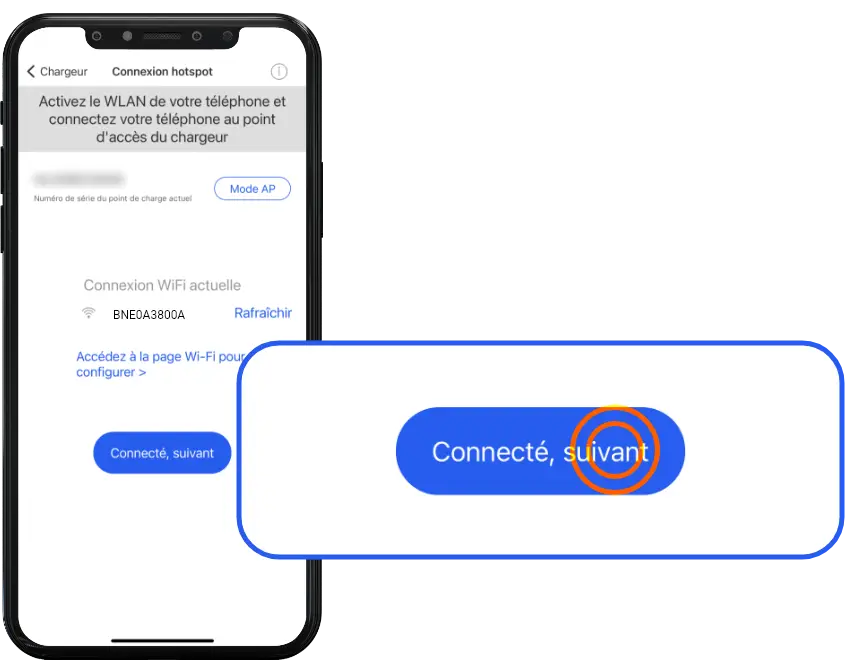
- Return to the application, then press “Connected, next” to access your terminal’s advanced settings.
- A timer of a few seconds will be displayed to confirm correct synchronization and communication between your terminal and your application.
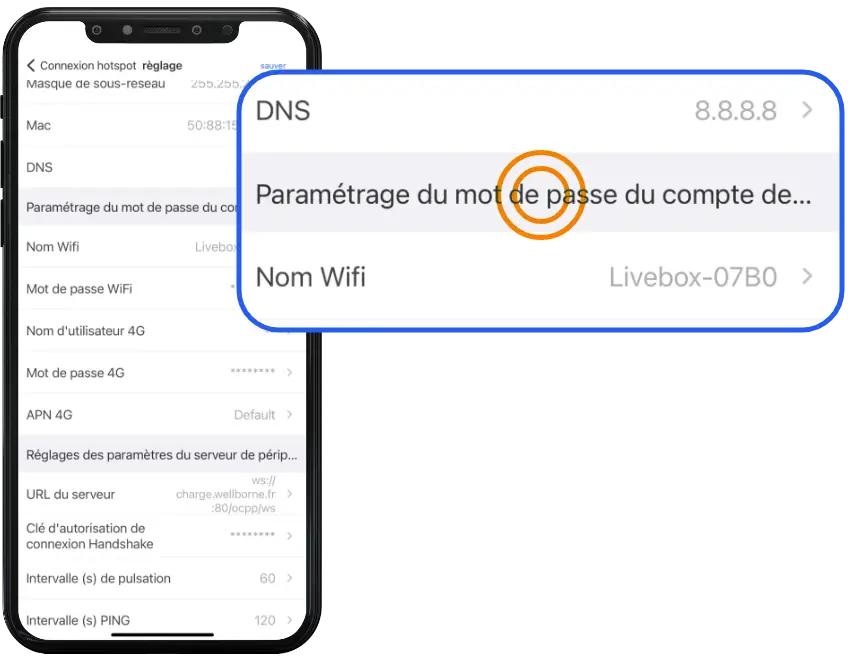
- Scroll down the settings menu to the “Device password and account settings” section.
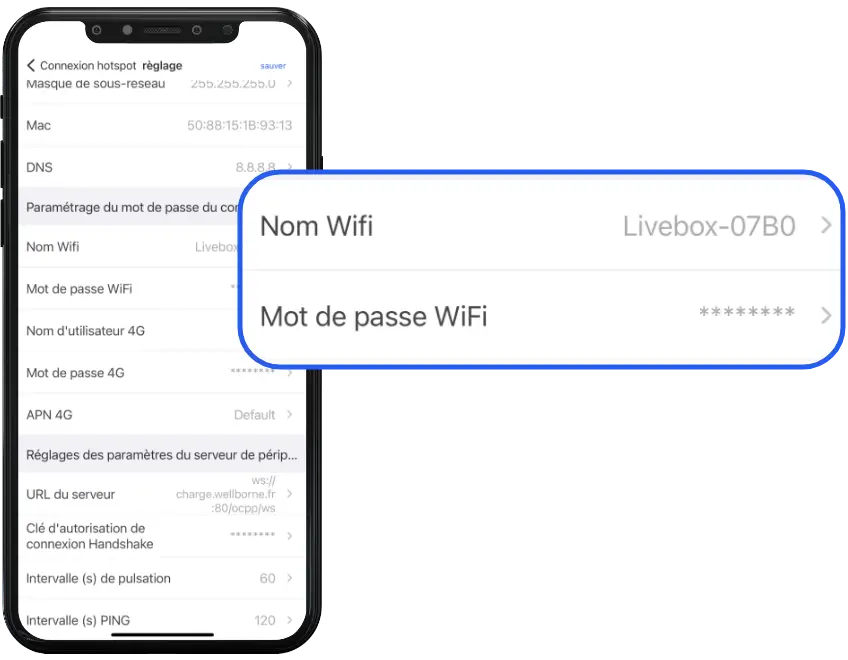
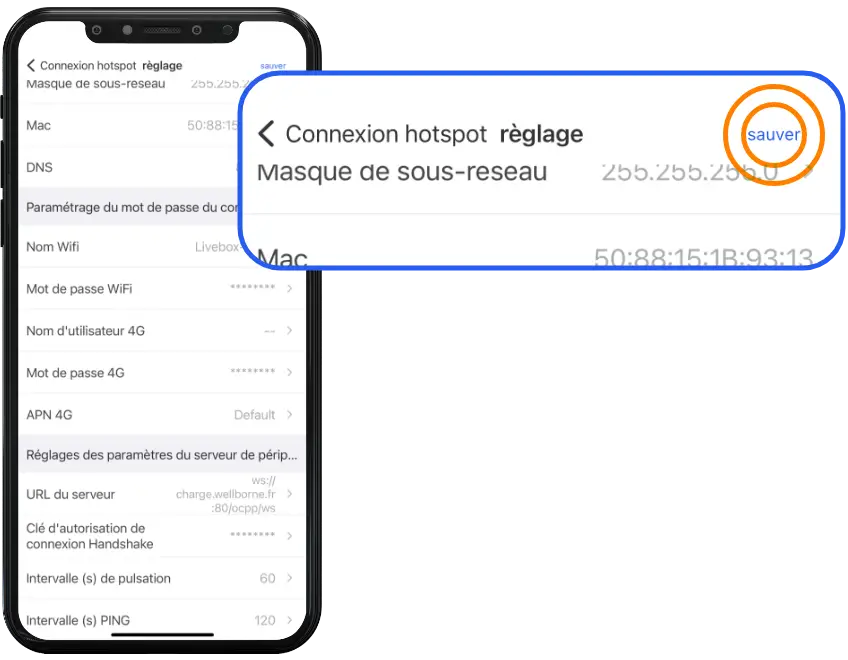
- Enter your Wi-Fi connection name (e.g. Livebox-70B0), then enter your Wi-Fi connection password (this must not exceed 32 characters and must not contain any ‘,’).
NB. Most modern routers emit two WiFi signals (2.4GHz and 5GHz). In some homes, or on your box if it doesn’t emit 5GHz WiFi as the default. But the charger can only connect to 2.4GHz WiFi.
So if the charger can connect to your cell phone’s hotspot, but can’t connect to WiFi at home, please check with the landlord or his box to see if it’s transmitting a 5GHz WiFi signal instead of 2.4GHz.
Please use the 2.4GHz WiFi SSID to connect the charger.
Help: https: //jib-home.com/frequence-wifi-2-4-objet-connecte/
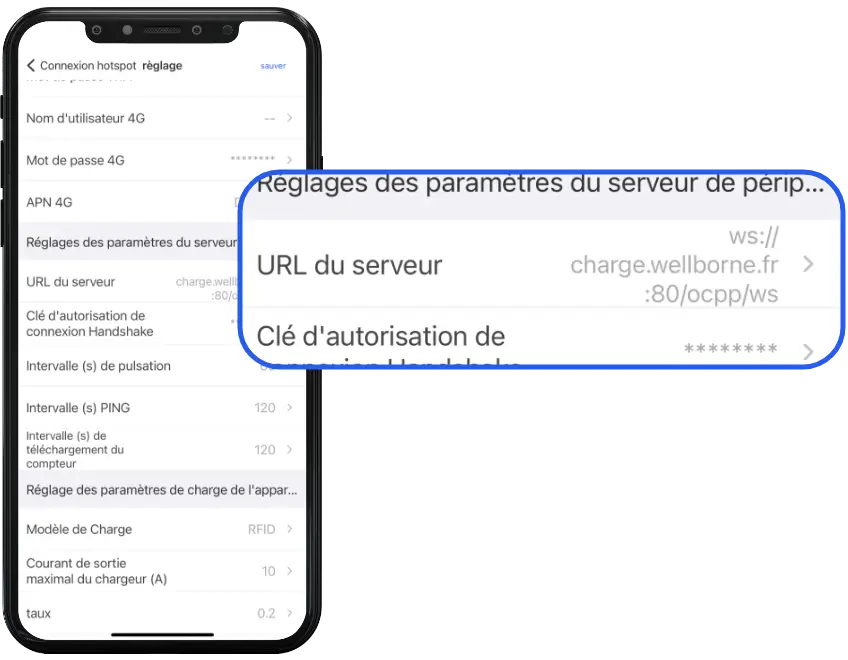
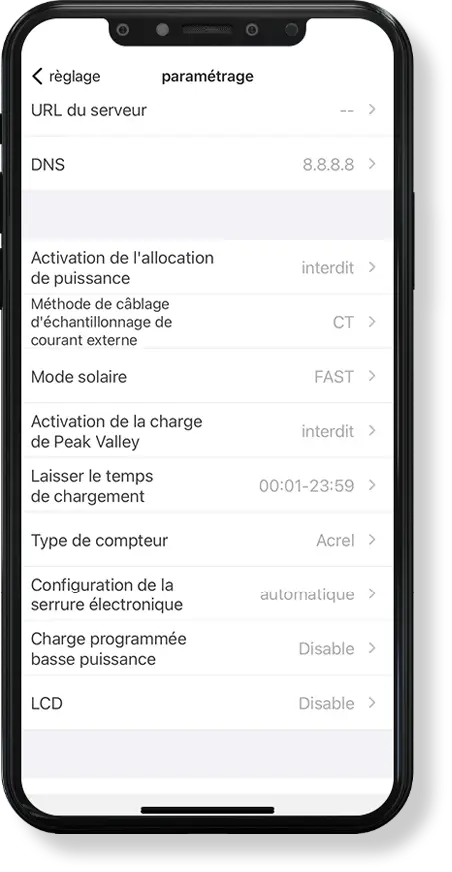
- Check that “server URL” matches “ws://charge.wellborne.co.uk:80/ocpp/ws“. To change the server name, you will be asked to enter the code 000000.
- Press “Save” at the top right of the screen.
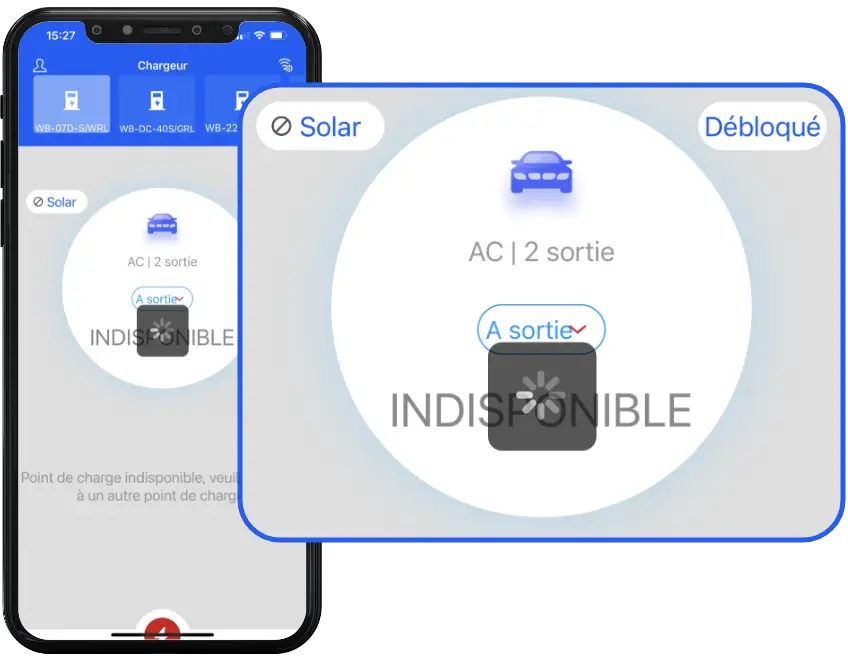
- Wait for the terminal to restart. the terminal backlight will flash yellow and beep several times to indicate that the terminal is operational.
NB. 1 – Once the connection information has been added, press the “Save” button in the top right-hand corner of the application, then return to the home page. You can now reconnect to your usual Wi-Fi or 4G connection. Wait 3 to 5 minutes for the Wi-Fi signal emitted by the kiosk to cease, and for the kiosk to synchronize with the assigned local Wi-Fi connection.
NB. 2 – Hotspot connection after initial commissioning
To activate the terminal’s hotspot, go to the application and follow the instructions below:
- Select the relevant terminal at the top of the home page.
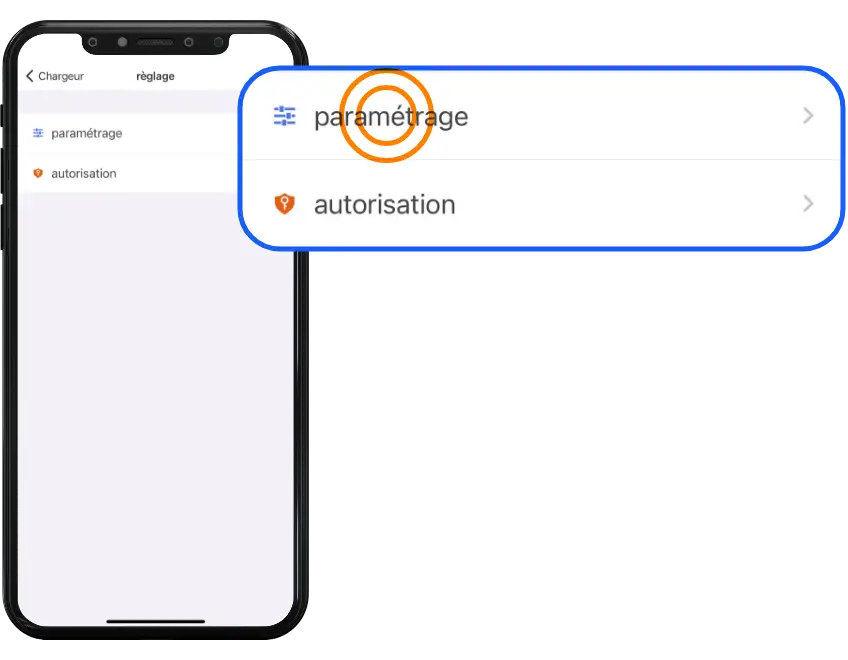
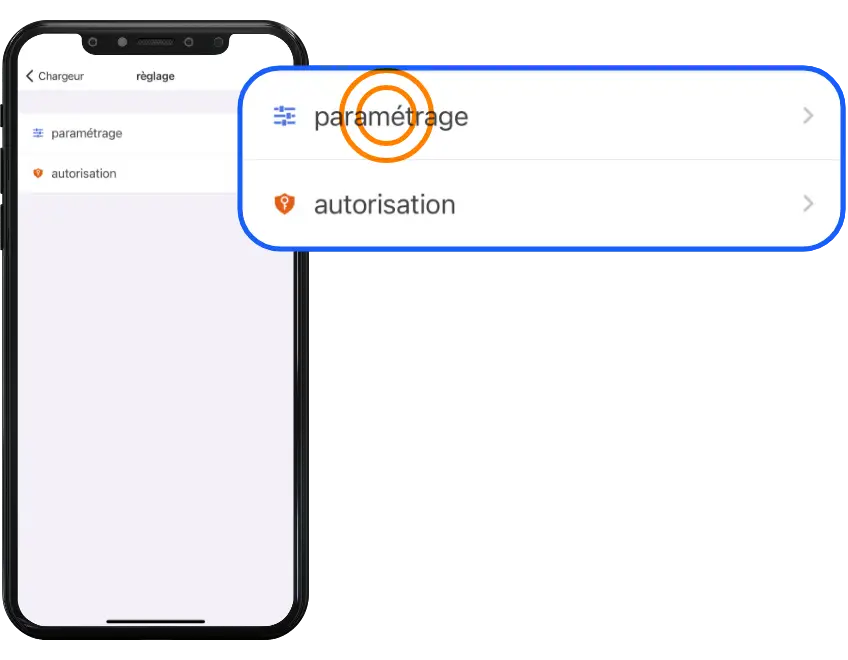
- Press “Settings” then “Parameters”.
- At the very bottom of the list, press “switch to AP mode” and click “enter”.
- The terminal will beep.
- Return to the application home page.
- Click on the Wi-Fi logo in the top right-hand corner of the home page.
- Click on “Go to WLAN page”.
- Choose your terminal’s serial number from the list of Wi-Fi sources.
- Return to the application home page.
- The serial number of your terminal should be displayed next to “refresh”, otherwise click on “refresh”.
- Once finished, click on “Connect, next”.
- You can then repeat the procedure from point 14.
- Return to the application’s home page and slide the screen down to refresh.
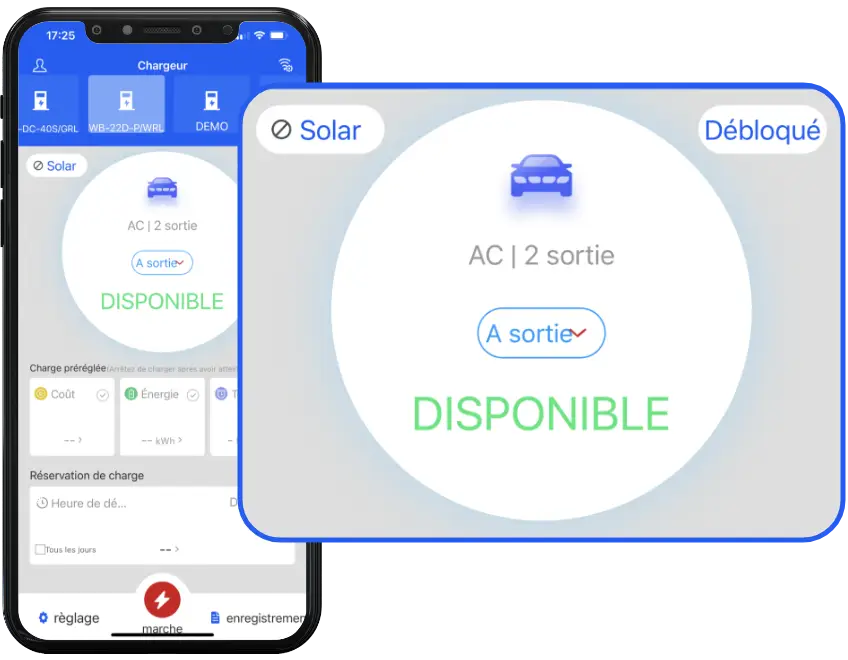
- As soon as the terminal appears as “AVAILABLE“, your terminal is online.
Choice of charging mode #
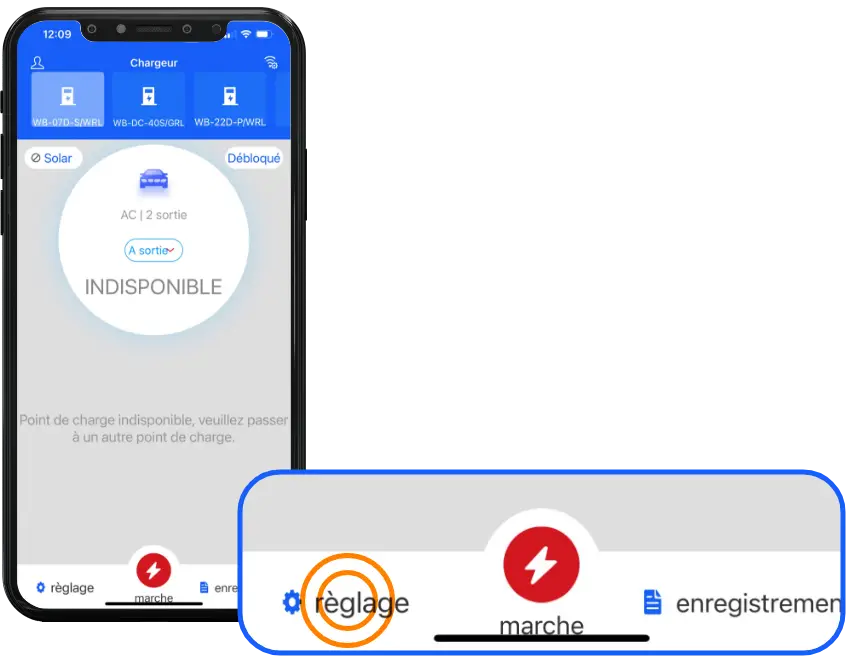
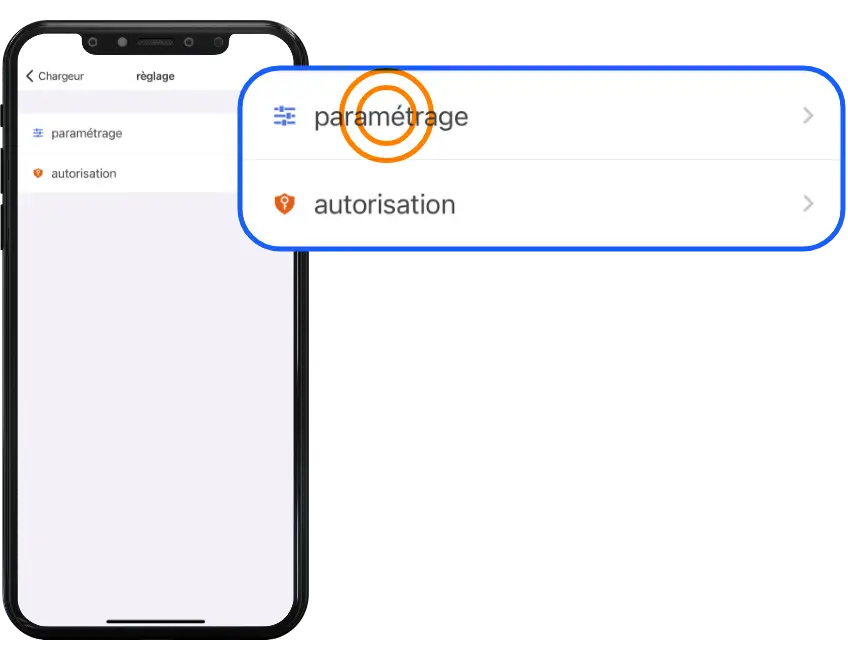
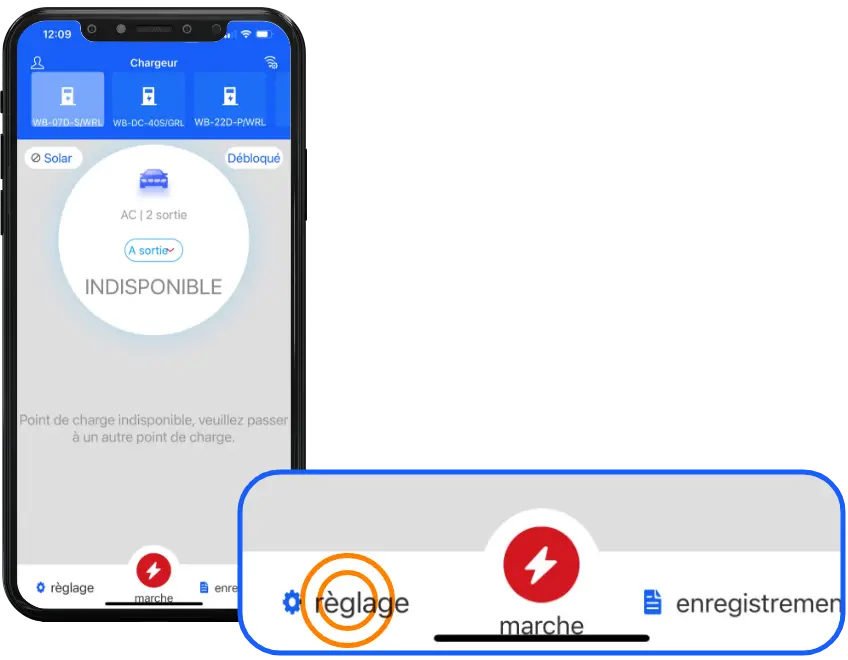
- Press the “Settings” button at the bottom left of the screen.
- Press “Settings“.
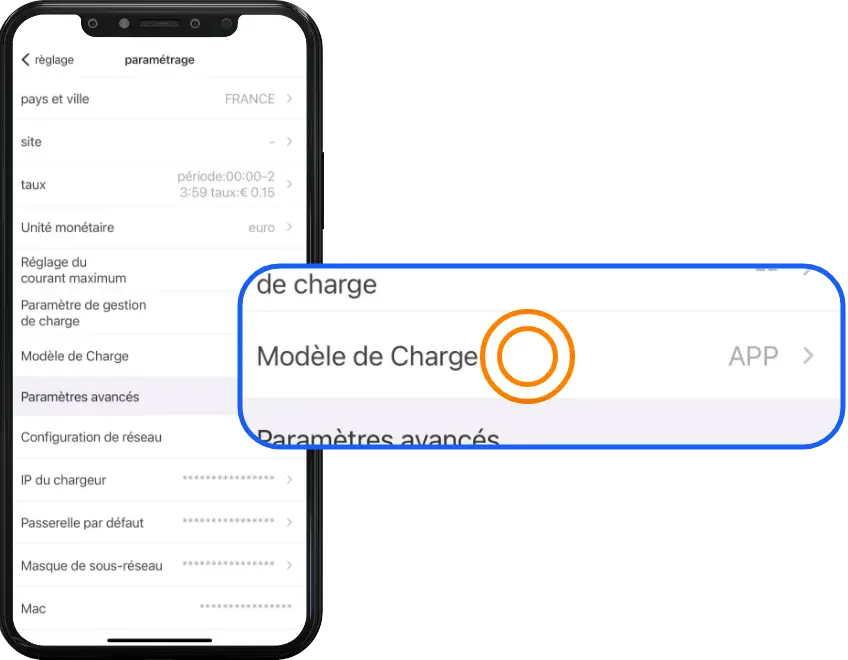
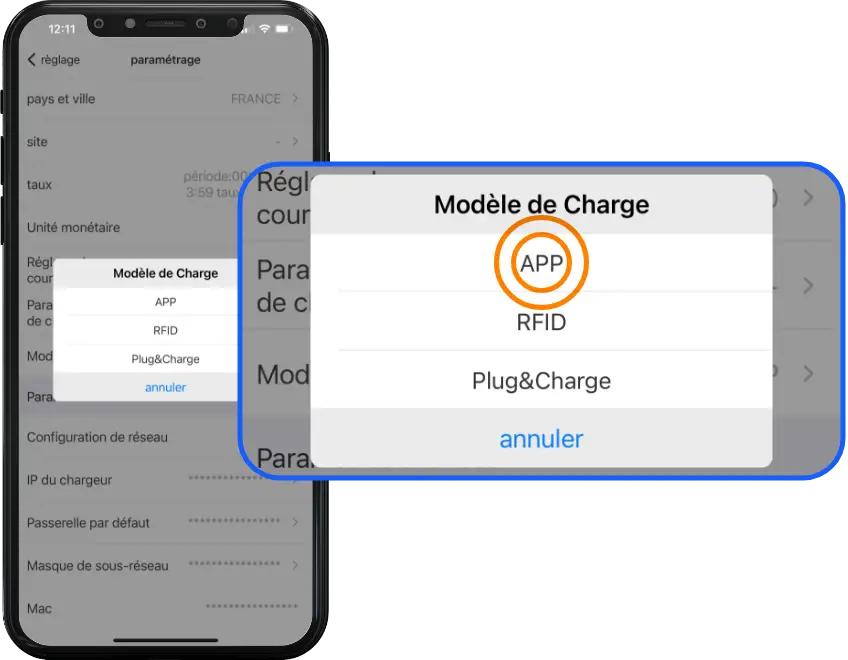
- Select “Load model“.
- To manage the start/stop of loads and programs remotely, you need to be in “APP” load mode.
Manual bollard power adjustment #
ATTENTION!
This setting is reserved for your installer or electrician when commissioning the bollard.
Wellborne accepts no responsibility for changes to this value after installation.
- To choose your charging mode, press the “Settings” button at the bottom left of the application.
- Select “Settings“.
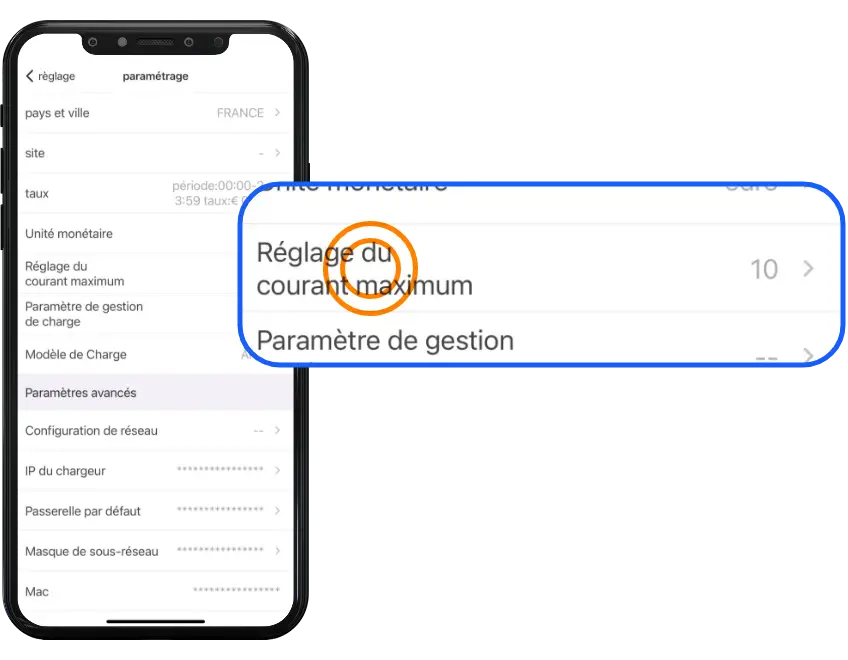
- Select “Maximum current setting“.
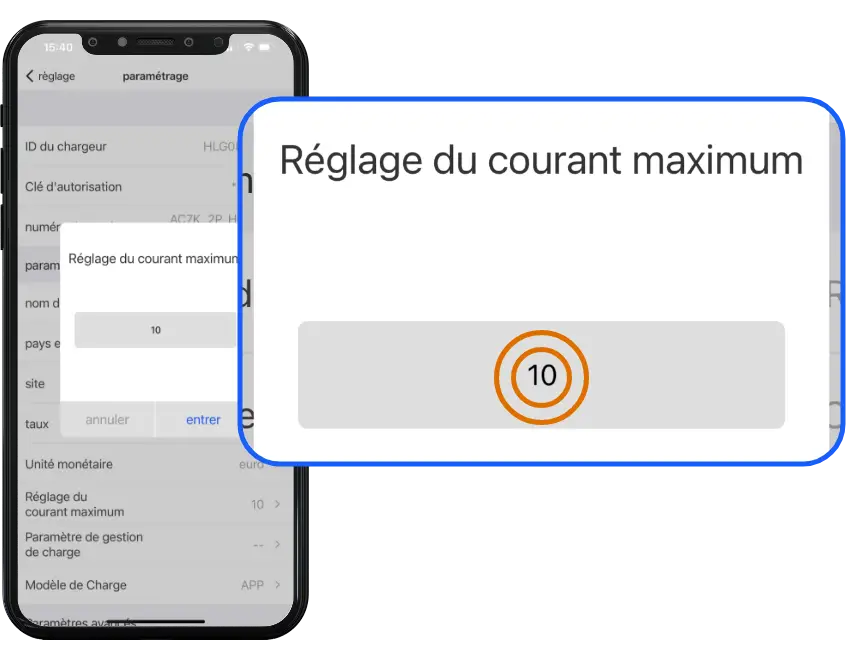
- Enter your maximum amperage (A) to limit the charger’s power then press “enter“.
Programming a refill #
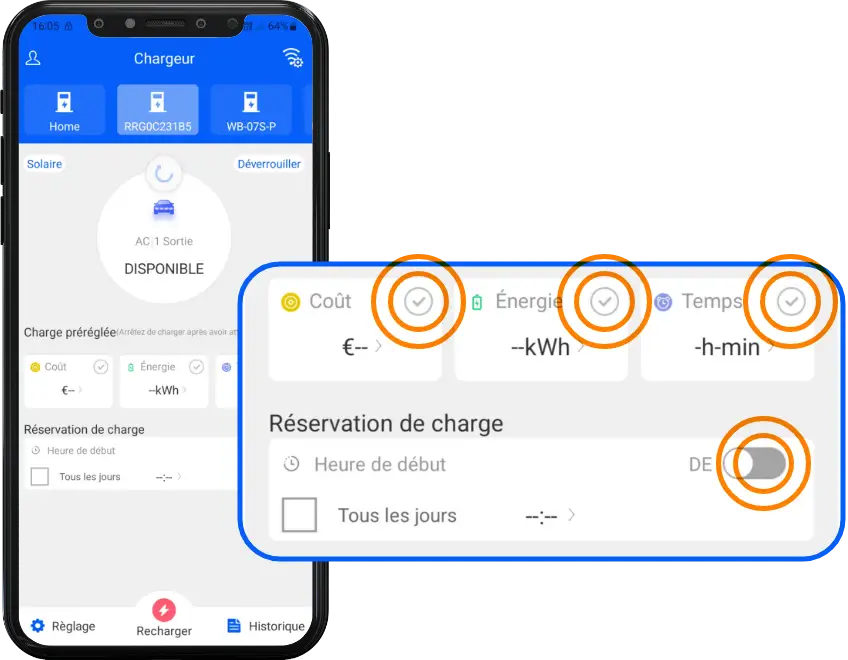
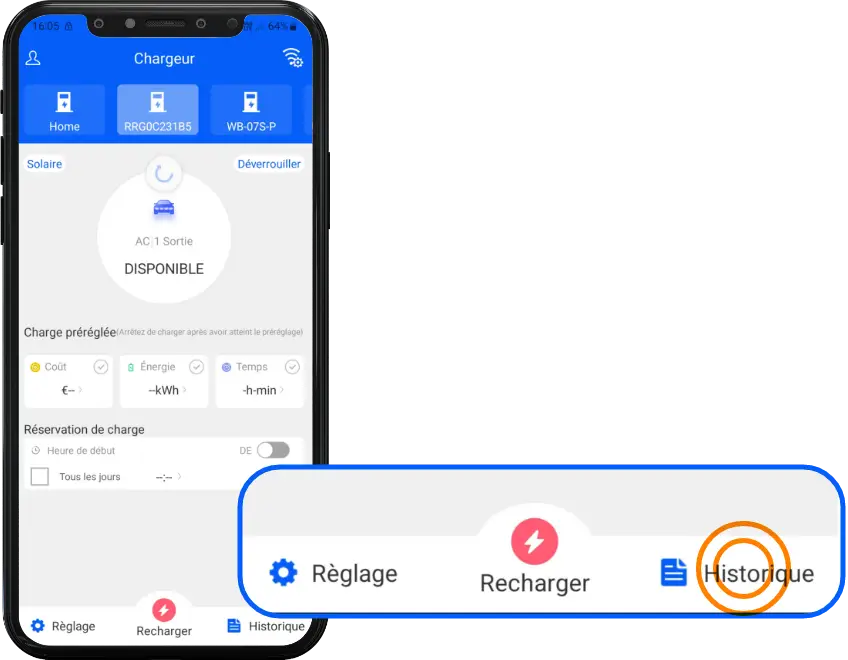
- On the home page, select“Cost“,“Energy“,“Time” to change settings.
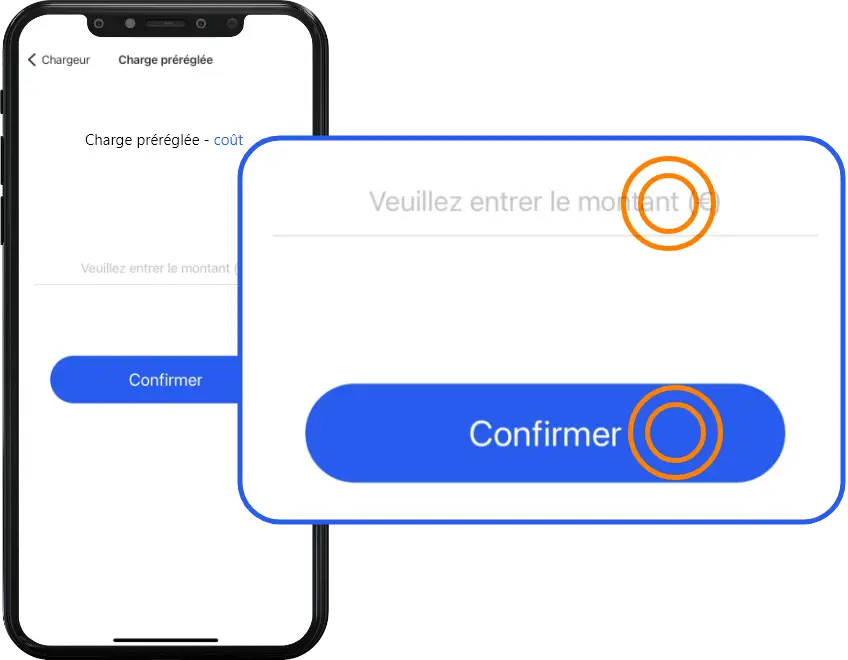
- Instant start with a predefined amount: Go to ” Cost “. Enter an amount in euros (€) and confirm. Press ” Reload “.
- Instant start with a predefined amount of energy: Go to ” Energy “. Enter an energy quantity in kWh. Press ” Reload “.
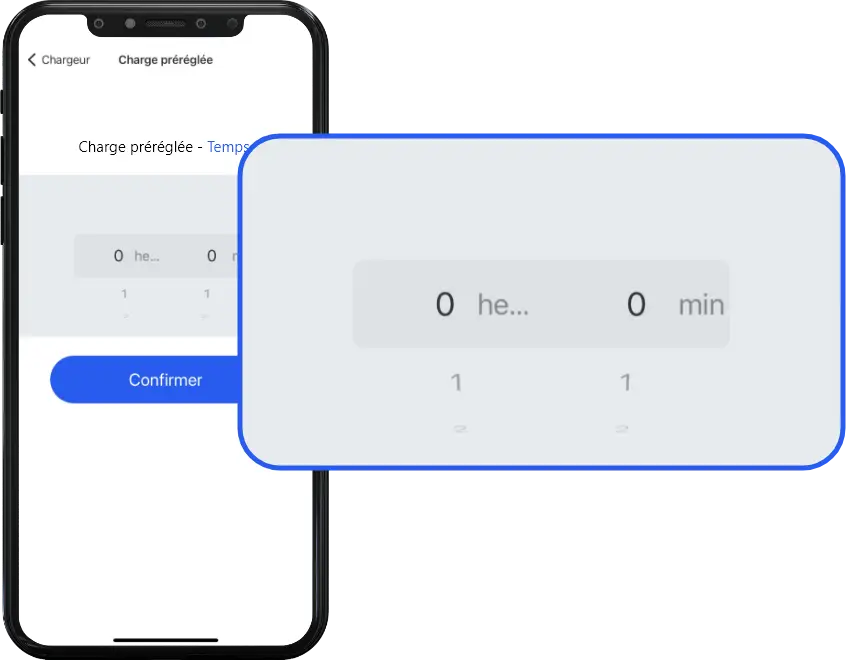
- Instant start with predefined duration: Go to ” Time “. Enter duration in h+mn Press ” reload “.
Recharge session history #
- Go to“History“.
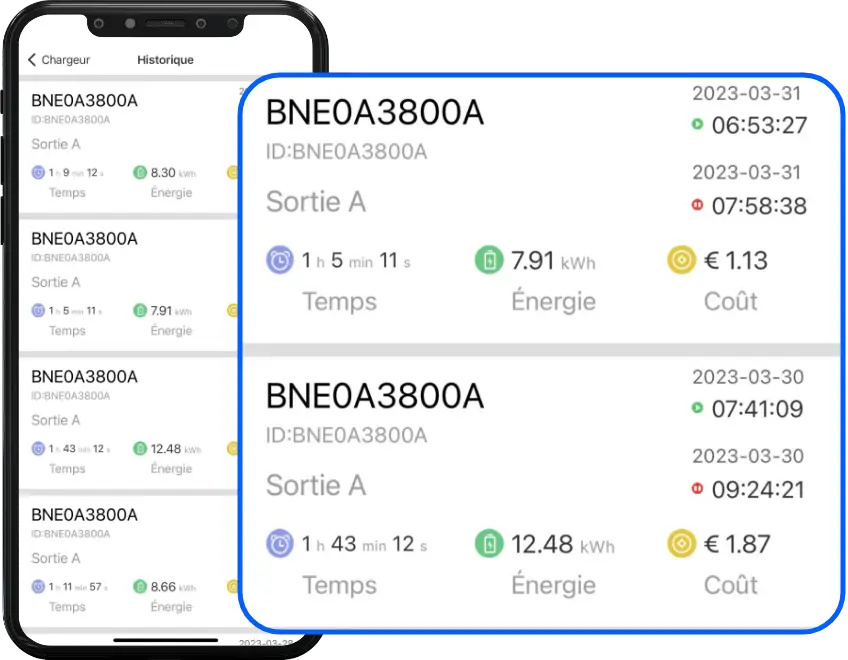
- The previous recharges page is displayed. The cost displayed depends on the kWh rate entered in the parameters.
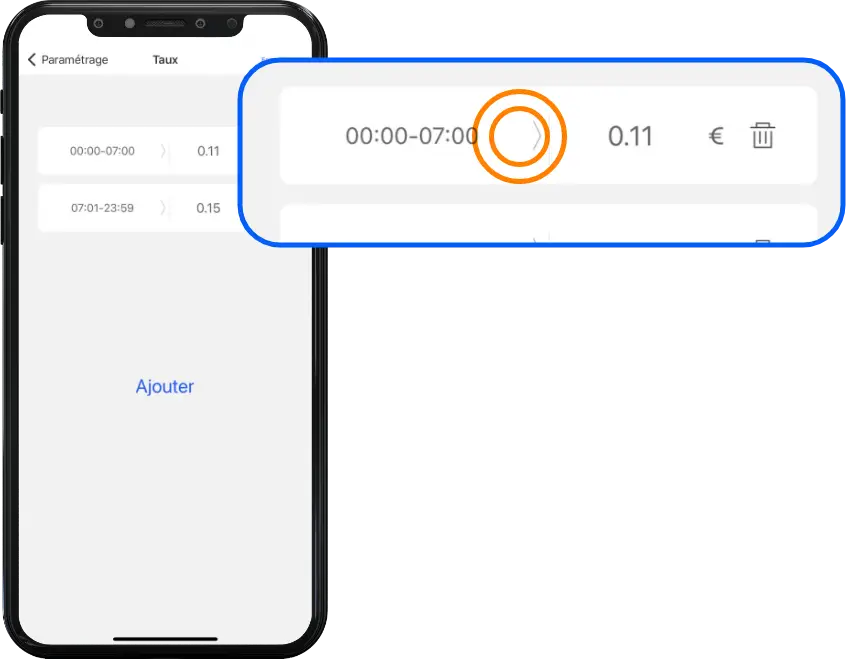
- kWh rate setting: From the home page, go to ” Settings “. Go to ” Rates “.
- Enter a single rate, or add several rates according to time slots. But be careful: the time slots must be added up to cover the whole 24 hours, without overlapping by a minute. Save your settings.
Reserve load / Programmed low-power load #
Reserve charging maintains a 6-amp charge to prevent the vehicle from going into standby mode, which could interrupt the programmed charge, normally set to take advantage of off-peak charging rates.
The user can use this function integrated into the Wellborne charger, or configure the vehicle manufacturer’s application to reactivate the vehicle at a specific time to enable charging, by combining the time the vehicle is switched on and the charge programmed on the WB Charge application.

